The Wilderness Protocol is simply a recommendation that those outside of repeater range monitor standard simplex channels at specific times in case others have priority or emergency calls. “FM & Repeaters”, June 1996 QST, p. 85.
This is designed to help communicate in a time of need while saving your battery. If there are a set (primary, secondary) of frequencies and a set time that people may monitor them, you can power up your radio, use it for a while, and then turn it off. Many HAMs monitor the primary/secondary frequencies at the designated time and even more to see if anybody needs assistance. It is suggested that if you make contact, you then take the conversation to another frequency to free it up for others.
Frequencies
146.520 FM – 2 m – PRIMARY
446.00 – 70 cm
223.5 – 1.25 m
52.525 – 6 m
1294.5 – 23 cm
Times (for 5 minutes)
Every three hours, starting at 7 am LOCAL TIME, until 10 pm LOCAL TIME
These directions are raw and will be tested the next time I need to add a repeater. The main point will be to print these out on a small card and keep it with me for when I’m away from my computer.
Press and hold the A/B button to get into edit mode If the upper left of the frequency does not have VFO, press the V/M key
Make sure the Automatic Repeater Shift is turned on
DISP -> Config -> 14 RPT ARS -> ON -> Back
Enter Repeater frequency. Should have a + or – above frequency in display. If not, manually enter offset.
Manually (if needed) enter the Offset direction
DISP -> CONFIG -> 15 RPT SHIFT -> Select +RPT or -RPT -> Back
Manually (if needed) enter Offset
DISP -> CONFIG -> 16 RPT SHIFT FREQ -> Back
ALTERNATE Path: DISP -> SIGNALING – 12 TONE SQL FREQ -> -> Back
Set Tone Squelch
“F” button -> SQTYP -> TONE TN -> Back
ALTERNATE Path: DISP -> SIGNALING -> 11 SQL TYPE -> TONE TN -> Back
I use this: https://heygrillhey.com/smoked-pork-chops/. Watch the below video and read the instructions in the link to get more information that I’m giving. I am only putting in the basic steps and a few things that I want to call out for myself to remember.
I’ve been using the below rub from my local Kroger. The seasoning itself tastes like the dust that is on BBQ potato chips. If you are making these chops for the first time, start out with a “medium” dusting, and then add more or use less depending on how you like the outcome.
I do something different on most of my smokes. Most directions want a pre-heated smoker but I don’t do that (for most things). I get everything ready and when I put the meat on the smoker, I then begin to apply the heat, with a warning. According to “people”, there is a bit of toxic smoke that comes off the wood when it’s just getting going. With this in mind, I DO start the grill with the lid open until I see the first signs of smoke. THEN I put what I’m going to smoke on there. Putting the meat on before fully preheated allows the smoke to stick to the cold meat for a bit longer and I find I get more of a smoky flavor and a slightly deeper smoke ring.
I prepared (seasoned, long talk about what’s going to happen) the chuck roast the night before.
When you are wanting to know what “done” is, you have to get to a minimum temperature, for safety and tribal knowledge, but after that you go by feel. For a roast you want to make sure the meat is loose and can sperate easily. You will have to use some claws or forks to see this. Don’t go PAST this and dry out the roast. It may take you a few times doing this to get it right. Hey Grill Hey suggests that when you use your temp probe, make sure it slides in like softened butter.
Wood Type: Whatever your favorite is for beef. Oak, Hickory, etc.
Again, the directions below are mostly from Hey Grill Hey’s site. Go check it out, it’s my “go to”.
The night before
Fully season the chuck roast. As you will read in my link to Hey Grill Hey, don’t be stingy with the rub and make sure you get it into all the cracks and crevices. Use your hands and work it over like it owes you money and chatted up your wife
Cover in plastic wrap to lessen any drying out
Put chuck roast back into the fridge and let it know you won’t ever forgive it, but you will let it stay in your house until the next morning (surprise coming!)
The day of
Put 1 cup of beef broth in a spray bottle
Using my method of putting the roast on the smoker before it’s fully heated, get it on there and set the temperature control to 225 degrees F
Smoke the roast, fat side up, for 3 hours, spray-basting once per hour. Don’t spray so much that you wash the seasoning off. Spray “enough” but not too much. You figure out what that means
Prepare the pan, onions and other ingredients before you need to take the roast off the smoker. You don’t want to mess around and let the temperature drop too much.
Place onions in pan and place chuck roast on top of the onions. Put in whatever other ingredients you like, such as fresh mushrooms, carrots, taters, etc. Pour the other 2 cups of beef broth into the pan
Put the pan of roast back in the smoker (or grill, now) and increase the temperature to 250 degrees F until the internal temperature is about 165 degrees F
Pull chuck roast off the grill/smoker and cover with foil.
Put back on grill/smoker and continue cooking until you get an internal temp of 200 degrees, but also monitor how easily it falls apart. You may need a bit more time.
Timing
Initial smoke: 3 hrs
Pan cooking: Until internal temp of 165 degrees F, 3 hrs or more
Covered cooking: Until at least 200 degrees F, and meat easily separates. Another 3 hrs or so
I’ve watched several videos of people making Mountain Man Breakfast out of a Dutch Oven. One of them is linked below. I’m taking a bit of this and that from those video and will make my own, though I AM using one of them as a base.
The below ingredients are a start. If you want plain sausage, use that. If you want Italian, Zesty Italian, or whatever, use it! Same with the potatoes. If you want to use diced or fresh cut, have at it.
1 lb bacon 1 lb sausage 1 lb shredded hash brown or diced potatoes (I use diced, and cook them in a pan before putting in, if possible) 1 large yellow onion Sliced Mushrooms to preference, if desired Bell peppers, if desired 12-18 eggs (you will have to figure out your amount) 8-16 oz shredded cheese (I’ll use chedder) 6 large biscuits Salt, pepper, other seasonings
Each week I listen to my calf area to see if I can increase my workload. Can I skip rope? Can I skip rope a bit more? How about ring work, can that be increased? Will increased aggressiveness doing any kind of boxing activity be just the amount of force needed to go backward, or will things be ok?
In weeks past I’ve been able to slightly increase each what I’m doing. Plain activity isn’t the issue, it’s a plyometric type of movements like forcefully pushing off or landing, that is the issue. Jumping jacks, box jumps, skip rope, some footwork drills ….. all are candidates to provoke it. I’m happy that I’m able to push forward ever so slightly, but that pace puts me behind where I need to be to survive Fight Night.
In addition to plain boxing skills, I need to be conditioned enough to put up a fight into the third round. I can either be better conditioned, more efficient, or smarter in what I do …. or all of it.
I had chosen all of it.
Ouchie
My calf wasn’t part of the thought process in this choice. On Tuesday morning my calf let me know it was not happy with how I’ve been conducting myself. It said, “Now Mike, remember who is running the show here?” Oh yeah, thanks for the reminder.
I’m not able to do certain activities for a while. How do I increase conditioning and work on boxing skills? My calf conditioning is one of the things that need to most work. Can’t do three rounds of two-minute chaos if your legs aren’t up for the task.
The answer to what to do is simple, and not so simple. Simply speaking the answer is “You do what you can’t and nothing more.” Thanks, self, that’s great advice. Jackass.
It’s going to be a reality that my calf just isn’t going to get the work that I feel is needed to be ready. It’s just not. With that in mind, I need to do everything else and wish for the best.
I’m not going to work a bunch of fancy boxing techniques. I’m going to stick with the basics and get better at them. Basic punches, basic defense, basic footwork, and all that. I’m going to have to figure out how to spar and not throw my calf into a tizzy. Thousands of punches will need to be thrown on the heavy bag, using a two-minute timer, to ensure my arms don’t go dead. Battle ropes will have to be …. battled to get extra work in. Air squats, wall sits, whatever …. for the legs. I’m going to break my bicycle out and get going on it (post to follow!). I could drop about 10 lbs of bodyfat as well, that can always help.
One of the keys to my progression as a boxer and surviving Fight Night is making sure I jab until the cows come home. Smartly, of course. You may say “Duh, the jab is the foundation for everybody, you idiot!” and I really couldn’t argue with you. However, for me personally on this Fight Night, it’s more important than most of the other fighters. I’m slower, less experienced, less conditioned, and taller. I’m working on ALL aspects that need improvement but the reality is, I need to use my height and reach to jab them into submission.
This I already knew.
Of course on my first live sparring, that “I already knew this…” went right out the window. Well, today my boxing coach not only brought it back in the window, he made it a place at the dinner table, made ME cook it dinner, and then let it sit in my favorite chair and use the remote. It immediately switched the channel to Lifetime Movie Network just to taunt me.
I jabbed and jabbed and on and on until I hallucinated and saw Jabber Jaw across from me, bobbing and weaving and saying “Nyuck nyuck nyuck!” as I wildly missed. I hate that stupid shark.
My left shoulder is hurting. Not injury hurting, but “push it real good!” hurting. Tomorrow is going to be interesting. I’m going to have to get my own intern just to open doors and brush my teeth.
Today is Monday. On Tuesday I’ll do active rest to include shadowboxing. Wednesday is a mitts class, Thursday more active rest, and then Friday will be live sparring.
Progress is all I require of myself. To do that I need to make sure my week is smartly planned. To do too much is going backwards, and I’ve had enough of that.
I ramped up my training last week. That Friday was live sparring, my calf/leg was feeling good, and motivation was high. During the week I started to feel lethargic because I wasn’t recovering well enough to start the next session “fresh enough”. Either my training volume was higher than my ability to recover, or my nutrition was holding it back or some combination of something.
I responded by over-eating and cutting out some training sessions to make sure everything was taken care of. I didn’t KNOW I was severely over-eating, but that’s what happened. It went on until Saturday until I slapped myself silly and told myself to get hold of me, and stop doing that. Then on Sunday, I didn’t do that, probably out of pity to myself.
Today I am back on track and will increment my training at a slower pace. I’ve got 10 weeks until my event, and I think I lost a week due to all this. I can’t have that happen anymore.
Tonight is my mitts session and I’m going to go as hard as my fitness allows me to go. Then tomorrow morning I’ll adjust my workout (battle ropes, sled) to fit how well I’ve recovered. Tomorrow afternoon is a fitness boxing session and if needed, I’ll cruise through it rather than destroy myself and my ability to do anything on Wednesday. If I don’t go “enough” during the fitness boxing I’ll stay after and finish off.
What throws wrenches into all of this is that I have two defined things I need to be fresh for. On Monday evening my mitts session needs to be very productive so I need energy and focus. On Friday evening I have live sparring so that is a key event. Pushing forward and holding back will be difficult, but I need to settle into a rhythm and get it done.
Using headgear has become a bit controversial. One thought is that by using it one could reduce the focus on defense and receive more shots to the head. While each shot would be less damaging than what would happen if no headgear was worn, the cumulative affect would be more damaging. It’s a similar argument that exists in many sports where the protective gear allows for more aggressiveness and potentially less care.
I understand that argument. I don’t know what the reality of it is, but I understand it. Personally, I think it’s an individual thing. If you come to rely on it then yes, I can see it. If headgear is just another protective tool in your toolbox and you still work as hard as you can on avoiding blows to the head, then it’s a smart precaution.
However ….. none of that really matters as the rules of amateur boxing, and specifically, the ones used by MPower during their Fight Night are clear …. you WILL wear approved headgear.
Punchout Glass Joe
MPower has headgear for us to use. It’s good gear. If I could find headgear that fit just right, get it adjusted, and use that same headgear each time, I’d use theirs. Obviously, I can’t guarantee that. Last night before our sparring, we all went to get headgear and there was enough to go around but I just started to think that maybe I should get my own. I had considered getting my own headgear a few days ago, but I made the decision to pull the trigger while I was walking towards the gear and everybody else was picking a set out. I’m serious about training, and Fight Night, so I should commit to some gear.
During sparring I got hit in the head a few times by jabs, one cross and one hook. I’m working on not having that happen but it’s going to. Since I WILL get hit, and I’ll be 50 years old by the time Fight Night occurs, I want to make sure I get a good set of headgear. I don’t need top of the line, but I also don’t want to cheap out either.
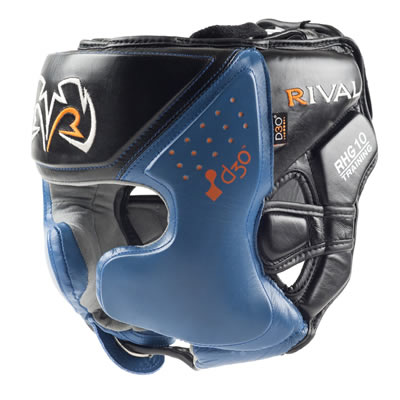
RIVAL RHG10 INTELLI-SHOCK HEADGEAR
After losing some sleep researching over the last few days, and specifically last night, I decided to go with Rival Boxing’s RHG10 INTELLI-SHOCK HEADGEAR.
I read many reviews and watched youtube reviews as well, and several stood out as what I was looking for. In the end, I just went with a gut feeling and chose this one. Why? Not sure. Maybe I just liked the looks of it, or when I winked at it I got a wink back? Heck, not sure why, but it was on my short list and I don’t think it would have mattered which one I chose.
I have no opinion on how it will feel, or work for me. When it arrives I’ll get it fitted and then wear it while doing non-sparring training, just to get used to it. They are supposed to arrive this coming Monday. If they do I’ll wear it while sparring and see how they hold up for real (sparring) use.
So … there you go. I’ve got my own headgear. It’s a good feeling.

 Each week I listen to my calf area to see if I can increase my workload. Can I skip rope? Can I skip rope a bit more? How about ring work, can that be increased? Will increased aggressiveness doing any kind of boxing activity be just the amount of force needed to go backward, or will things be ok?
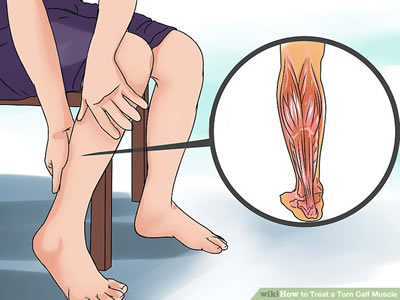
 I jabbed and jabbed and on and on until I hallucinated and saw Jabber Jaw across from me, bobbing and weaving and saying “Nyuck nyuck nyuck!” as I wildly missed. I hate that stupid shark.